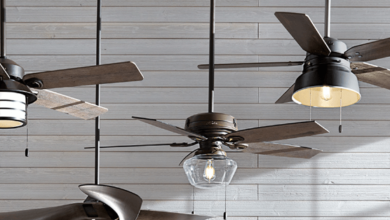
Are you ready to take your home comfort and style to new heights? Look no further because today we’re here to guide you through installing a ceiling fan – the ultimate addition to any room! Whether you’re a seasoned DIY enthusiast or just starting with your home improvement journey, our step-by-step instructions will have you feeling like a pro in no time. So grab your tools, turn up the anticipation, and dive into this comprehensive guide that will leave you breezing through the installation process!”
Introduction
If you’ve been considering installing a ceiling fan but haven’t gotten around to it, now is the time! In this article, we’ll walk you through installing a ceiling fan step-by-step. First, you’ll need to gather your materials.
Tools and Materials Required
To install a ceiling fan, you will need the following tools and materials:
-Punch list
-Hammer
-Chisels
-Drill
-5/8″ hole saw
-Tape measure
-Screwdriver
-Wrench set
-Cordless drill/driver
-Jigsaw
-Circular saw
-Paint or a sealant such as Sticky tack or Zap Paint specifically designed for woodworking. (Recommended)
Additional supplies may include; an electrical box cover, wall anchors, screws, wire nuts, washers and bolts.
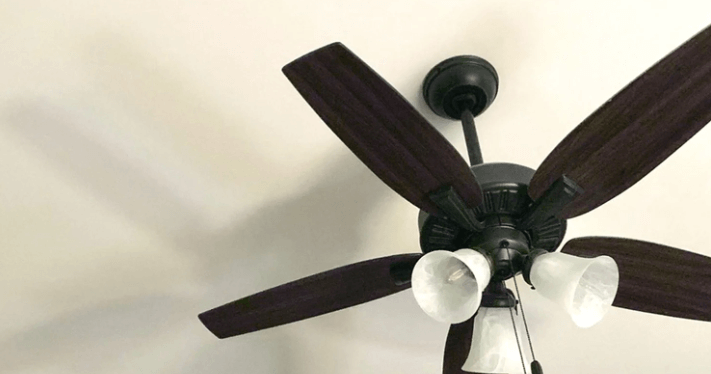
Step 1: Measure the Length of the Ceiling Fan Cage
To install a ceiling fan, you must first measure the fan cage’s length. To do this, use a straight edge and measurement tape to determine the room’s length. Once you have calculated the length, cut the wire cage to that size using wire cutters or a hacksaw. Make sure to wear safety glasses when cutting wires! Next, install the mounting bracket onto the ceiling using screws or nails. Attach the fan by threading the connecting wires through the mounting bracket and into the fan motor.
Step 2: Cut Hole in the Ceiling for the Cage
To install a ceiling fan, you will first need to cut a hole in the ceiling. Use a jigsaw or handsaw to make the hole large enough for the fan housing. Be sure to measure the distance from the hole’s edge to where you want the fan blades to hang and ensure that the blade clearance is wide enough. The blade clearance should be at least 2-3 inches. Next, use a drill bit that is slightly larger than the mounting screws and screw them into the joist below your ceiling. This will keep your fan light assembly in place while attaching the fan motor and chain.
Step 3: Screw Cage to Ceiling
If you’re looking to install a ceiling fan, the first step is to determine the size of the blade you need and the mounting location. Once you know those details, you can choose a fan cage or screw-mounting kit.
To attach the blade to the cage, either use a screwdriver to tighten two screws in each corner or use a mounting kit that includes all the screws and brackets. When installing Minka Aire ceiling fans with blade sight, ensure the power cable enters from below so it doesn’t block light from flowing into corners.
Step 4: Attach Blade Guards and Chains
If you install a ceiling fan without chains, now is the time to attach the blade guards and chains. First, secure the blade guards to the fan housing using the included screws. Then loop one end of each chain around one of the screw holes on the guard and pull tight. Do the same with the other chain end. Tighten each chain link by tightening its respective screw. Be sure not to over-tighten!
Step 5: Test Fan and adjustments if necessary
If the fan’s blade is not turning or is not moving the air enough, something may be blocking the fan’s rotation.
1. Remove any obstruction from the fan by gently pushing or pulling on the cord. If it still does not work, move the fixture closer to the wall or doorjamb to increase airflow. If this doesn’t work, you must remove the fan and check for broken parts.
2. Open the canopy by unscrewing both screws at each end (one on top and one on bottom).
3. Move the blade holder and motor assembly out of their hiding place so you can see if anything is obstructing their motion (usually, a clip or tab will hold it in place). If everything looks clean, reattach everything and screw it back in place. If there is still a problem with airflow, you may have to replace some parts.
4. Turn on your exhaust fan by pressing and holding down two switches near its light chain – usually, these are mounted near ceiling joists. Once your exhaust fan is turned on, open your windows as much as possible while maintaining good air circulation inside your home (ideally 50% open). Close all windows but for one that leads out onto your front porch/lawn etc., then release all switches until only one remains lit (this switch should now turn off when you press it).
Conclusion
Installing a ceiling fan can be a breeze with the help of this guide. Everything you need is listed with step-by-step instructions, so you will have no trouble installing your new ceiling fan in no time! Be sure to read through the tips and cautionary notes at the end of the article, as well, for more information on how to take care of your new ceiling fan. Congratulations on making this upgrade and enjoy your newfound airflow!